Installing Sparkl
This is just a very brief walkthrough, Francesco Corti has already published an excellent step by step tutorial here, so please have a look there for detailed instructions):
From Home > Marketplace install Sparkl (and any dependencies like CDE etc).
Once installed, restart the biserver.
Initial App Setup
Let’s create our first app: Tools > Sparkl. Click on the BIG plus icon, then on CREATE: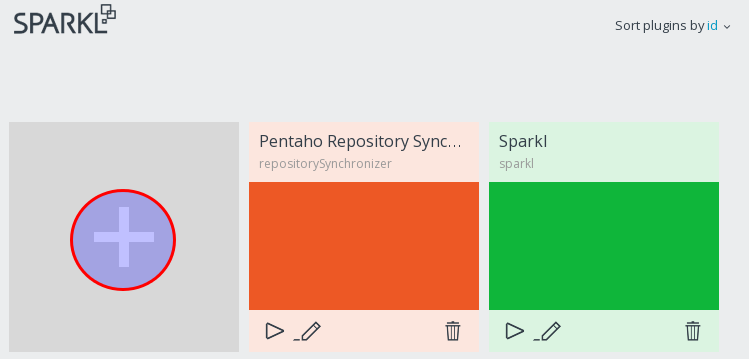
Assign a unique name and click Create Plugin:
Then you are informed that:
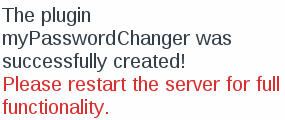
So do as you are told ;) and restart the server.
If on next login your Pentaho User Console looks fairly blank and you find this error message in the log:
21:23:55,460 ERROR [GenericServlet] GenericServlet.ERROR_0004 - Resource /data-access/resources/gwt/D9EA02CD60EF4F8D3A2BD2613D9BB9A8.cache.html not found in plugin data-access
… then clear the browser cache and all problems should be solved.
So once you have your normal PUC back, go to Tools > Sparkl. You should see your app now: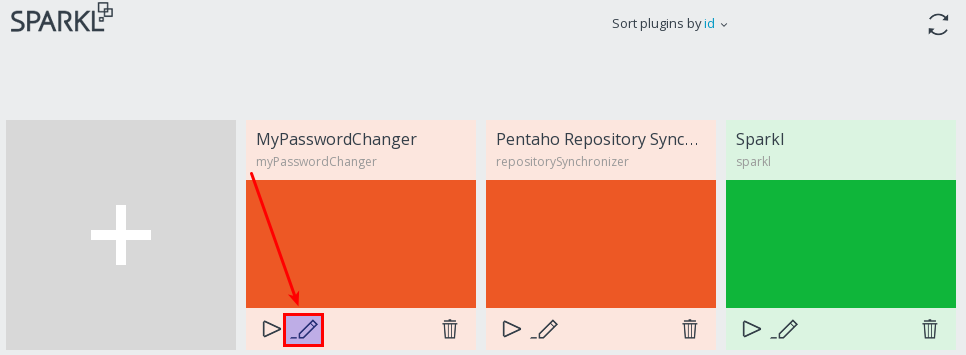
Click the Edit icon. Time to provide some app details: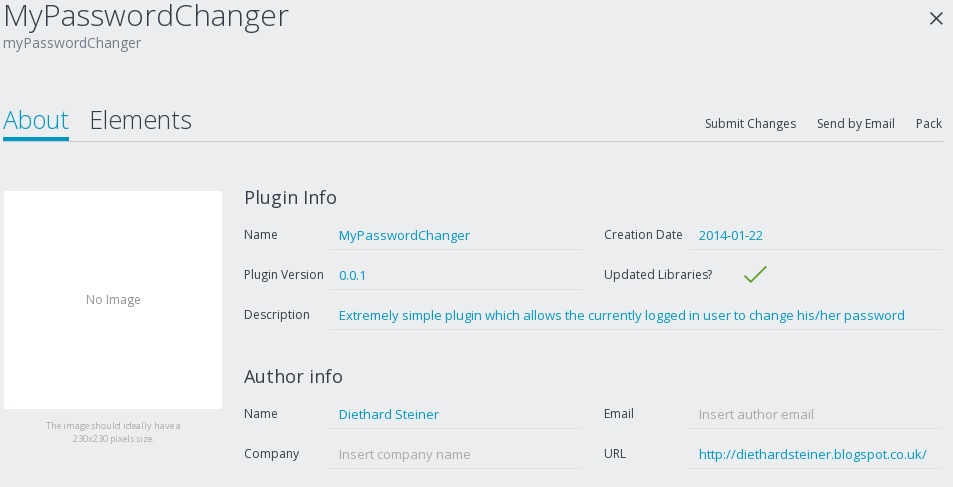
Next click on Elements, where we can define the endpoints. Endpoints can either be CDE dashboards [frontend] or Kettle transformations [backend].
Click on Add new Element. Add 1) a dashboard and 2) a Kettle transformation: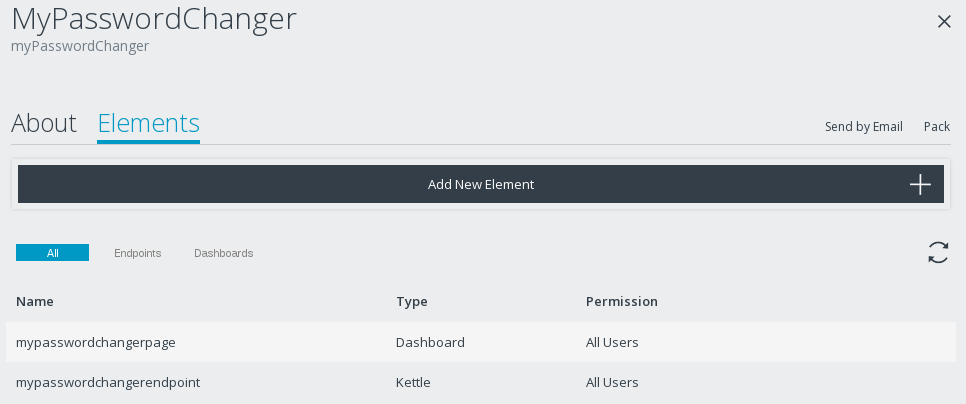
All your app files are stored under:
pentaho-solutions/system/myPasswordChanger
The Pentaho Kettle job can be found in:
pentaho-solutions/system/myPasswordChanger/endpoints/kettle/mypasswordchangerendpoint.ktr
I am sure you can’t wait to have a look at this Kettle transformation, which has just been created for you … well, let’s go ahead and fire up Spoon and open up this file:
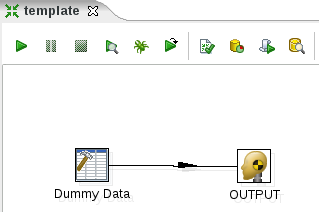
Still excited? Well, you didn’t expect everything to be done for you … did you? That’s why your special insider knowledge is still required here! But more about this later on.
Creating the dashboard
As you are probably aware of by now, Sparkl makes use of two very popular tools: CDE and Kettle. So if you have ever used CDE to create dashboards before, editing the Sparkl dashboard should be quite familiar to you!
Ok, let’s edit the dashboard:
We will use a very simple approach here (the aim here is not to create a fancy looking dashboard, but just some very simple prototype):
- Create a row called passwordTextRow.
- With passwordTextRow still marked, click on the Add HTML icon.
- Mark the HTML row and add this HTML snippet on the right hand side:
<p>Specify your new password:</p> - Then add a new row called passwordInputRow. For this row, add two columns, one called passwordInputColumn and the other one passwordSubmitColumn. The layout should now look like this:
- Save the dashboard and switch to the Component Panel.
- Create a parameter: Generic > Simple Parameter. Call it passwordParameter.
- Add a button: Others > Button Component. Call it passwordSubmitButton. For Label specify Submit and for HtmlObject passwordSubmitColumn (just press CTRL+Space to retrieve the values of the available HtmlObjects):
- Add an Input field: Select > TextInput Component. Name it passwordTextInput, assign the Parameter passwordParameter and the HtmlObject passwordInputColumn to it:
- Now switch to the Datasource Panel. Remove the SQL dummy query.
- From the left hand side open MYPASSWORDCHANGE Endpoints and choose mypasswordchangerendpoint Endpoint. For this datasource specify the name myPasswordChangerDS in the Properties section:
- Switch back to the Components Panel. In the Components area select the Button Component. Click on Advanced Properties.
- For Action Parameters specify passwordParameter as [["passwordParameter"],["passwordParameter"]] and
- For Action Datasource specify myPasswordChangerDS. At the time of this writing there were considerations about moving the datasource property to main properties area (instead of advanced properties), so this might have changed by the time you read this.
- For Listeners specify passwordParameter
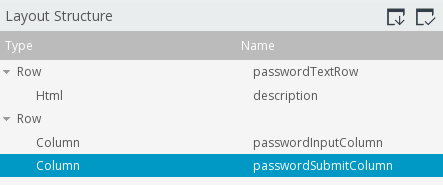



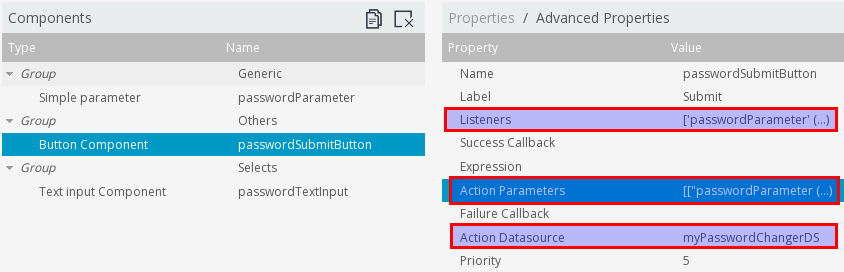
- Save the dashboard.
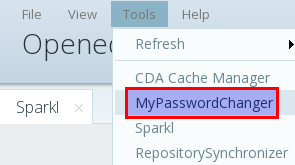
- Let’s see how our Sparkl plugin looks so far. Choose Tools > MyPasswordChanger:
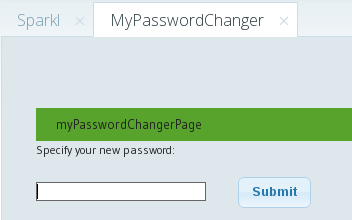
And you should see something like this:
Preparing the Kettle transformation
You can find a detailed documentation of the REST endpoints here (download the doc file). Harris also wrote an excellent blog post about it.
Extract the documentation zip file (which you just download) and then open the index file in your favourite web browser.
Click on UserRoleDaoResource from the REST Resources list, then choose /userroledao/updatePassword:
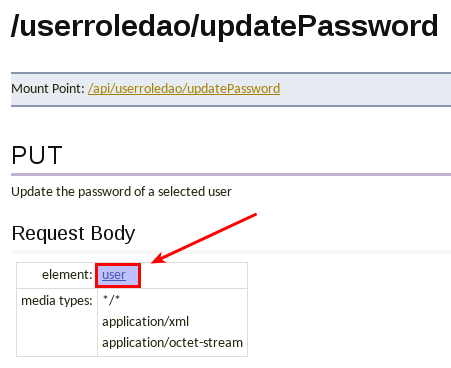
Let’s inspect the request body element a bit closer, so click on the user link:
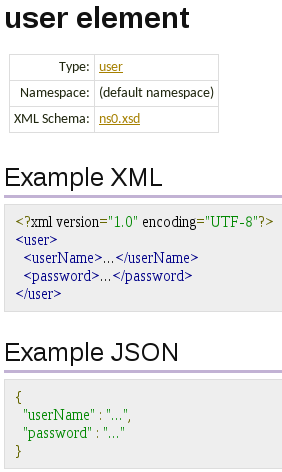
So this tells us that we can either send an XML or JSON document containing the userName and password to this REST endpoint.
It’s a good idea to first experiment a bit with the REST services by using the popular command line tool curl:
Let’s start first with a simple get request. Note the use of --user to specify the authentication details:
$ curl --user admin:password -i -H "Accept: application/json" -H "Content-Type: application/json" http://localhost:8080/pentaho/api/userroledao/users
HTTP/1.1 200 OK
Server: Apache-Coyote/1.1
Set-Cookie: JSESSIONID=7A850427D26D6F6AABA2B5BC3C7F40D7; Path=/pentaho
Content-Type: application/json
Transfer-Encoding: chunked
Date: Tue, 28 Jan 2014 20:56:49 GMT
{"users":["suzy","pat","tiffany","admin"]}
Let’s get some role info (here we supply one parameter):
$ curl --user admin:password -i -H "Accept: application/json" -H "Content-Type: application/json" http://localhost:8080/pentaho/api/userroledao/userRoles?userName=admin
HTTP/1.1 200 OK
Server: Apache-Coyote/1.1
Set-Cookie: JSESSIONID=92D98FAF9C5D23CF0ACADAB8655E287D; Path=/pentaho
Content-Type: application/json
Transfer-Encoding: chunked
Date: Tue, 28 Jan 2014 20:55:29 GMT
{"roles":["Administrator"]}
So now let’s try the more complicated task of updating the password: We have send along some XML document. This can be accomplished by using PUT with the -d option (d for data):
$ curl -i --user admin:password -H "Content-Type: application/xml" -H "Accept: application/xml" -X PUT -d '<?xml version="1.0" encoding="UTF-8"?><user><userName>admin</userName><password>test123</password></user>' http://localhost:8080/pentaho/api/userroledao/updatePassword
HTTP/1.1 200 OK
Server: Apache-Coyote/1.1
Set-Cookie: JSESSIONID=3AC126B2276665B4F0FE655EC29A4964; Path=/pentaho
Content-Length: 0
Date: Tue, 28 Jan 2014 21:15:08 GMT
Alternatively you could create an XML file:
$ vi update.xml
Copy and paste:
<?xml version="1.0" encoding="UTF-8"?>
<user>
<userName>admin</userName>
<password>password</password>
</user>
Then issue this command:
$ curl -i --user admin:password -H "Content-Type: application/xml" -H "Accept: application/xml" -X PUT -d @update.xml http://localhost:8080/pentaho/api/userroledao/updatePassword
If you try to log on to PUC now, you will have to use your new password!
Enough playing around with curl! We have established that updatePassword REST API is working as expected.
The next step is to prepare a basic working Kettle transformation with the same functionality:
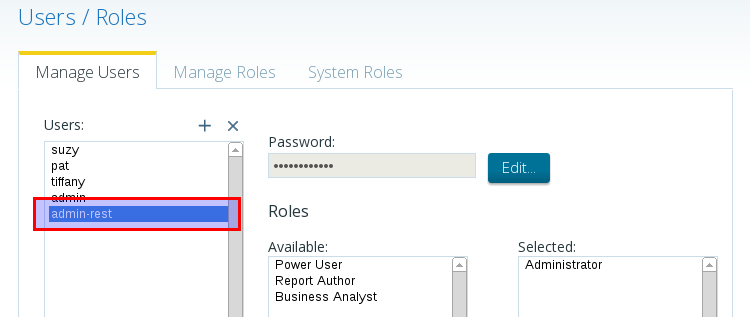
- Create a new biserver-user with admin rights which we can use just for authentication purposes.
- Fire up Spoon and open mypasswordchangerendpoint.ktr
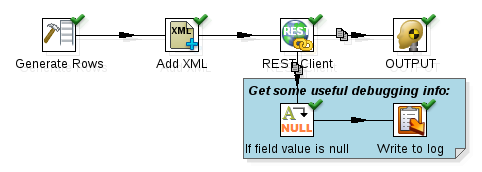
- Amend the transformation to look like the one shown in the screenshot below:
- Double click on Generate Rows. Set the Limit to 1. Create three fields:
Field
|
Type
|
Value
|
url
|
String
|
http://localhost:8080/pentaho/api/userroledao/updatePassword
|
user
|
String
|
your username
|
password
|
String
|
your password
|
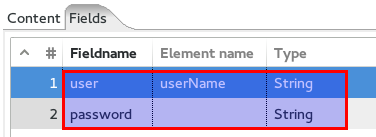
- Double click on Add XML. Into the Output Value field type userXML and into the Root XML element field user:
- Next click on the Fields tab. Configure as shown below:
- Double click on the REST client step. Configure as outlined below:
- General:
- URL name field: url
- HTTP method: PUT
- Body field: userXML
- Application Type: XML
- Authentication
- HTTP Login: admin-rest
- HTTP password: test123 (note: use the details of the specially created rest admin user here!)
- Finally configure the logging step to output the essential infos.
- Run the transformation.

When finished, restart the server (which is the official way to deploy your transformation).
Go to Tools > MyPasswordChanger. Click the submit button.
In a terminal window watch the Tomcat log:
[dsteiner@localhost biserver-ce]$ tail -f tomcat/logs/catalina.out
2014/01/29 19:03:49 - Write to log.0 - =======================
2014/01/29 19:03:49 - Write to log.0 - === KTR REST RESULT ===
2014/01/29 19:03:49 - Write to log.0 - =======================
2014/01/29 19:03:49 - Write to log.0 -
2014/01/29 19:03:49 - Write to log.0 - result = Password was changed successfully!
2014/01/29 19:03:49 - Write to log.0 -
2014/01/29 19:03:49 - Write to log.0 - ====================
2014/01/29 19:03:49 - OUTPUT.0 - Finished processing (I=0, O=0, R=1, W=1, U=0, E=0)
Watch out for the REST call result message. Here we see that the password was changed successfully. You don’t believe it? Log out of PUC and back in (with the new password).
Ok, now we know that this is working. Let’s make everything a bit more dynamic:
- username: CPK server side parameter (currently logged in user)
- password: supplied by CDE dashboard
- URL: IP and port
- authentication username
- authentication password
We will not test the transformation any more in Spoon.
How to pass a standard parameter from a dashboard to a Kettle job or transformation
As you remember, we defined earlier on the passwordParameter parameter in CDE. To pass the value of this parameter to a Kettle job or transformation, simply define the parameter in your job/transformation as you would normally do:
- Open mypasswordchangerendpoint.ktr in Spoon.
- Right click on the canvas and choose Transformation settings.
- Specify the a new parameter called passwordParameter. As you might have guessed, this parameter name has to be exactly the same as defined in the dashboard:
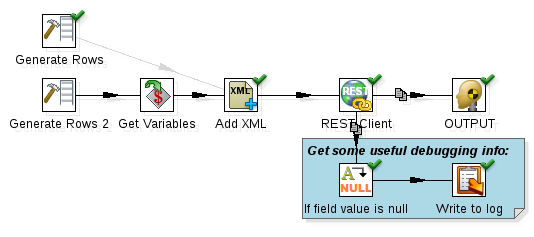
- Change the transformation to look like this one:
Disable the hob from the original Generate Rows step to Add XML. Add a new Generate Rows and a Get Variables step. For now the new Generate Rows should only supply the url and user values: Right now we just want to test if the password parameter is passed on properly. Open up the Get Variables step and create a new fields called password which references the variable ${passwordParameter}:
This setup enables us to use the passwordParameter originating from the dashboard in our Kettle transformation stream. - Just for testing purposes write the password field to the log (so that we see that the value is actually passed on). Change the Write to Log step config respectively.


Server-side Parameters
Kettle Properties
As you might well know, Kettle transformations/jobs running on the server have access to the kettle.properties file as well as long as everything is properly configured. If you have everything installed on one machine and are using the default settings, there is actually no additional setup on the biserver side required. The biserver will automatically access ~/.kettle/kettle.properties.
So for the REST authentication (server IP and port) I just defined a parameter in the kettle.properties file like this:
VAR_PENTAHO_BISERVER_URL=http://localhost:8080/pentaho
VAR_PENTAHO_BISERVER_USER=admin-rest
VAR_PENTAHO_BISERVER_PW=test123
Sparkl server side parameters
Sparkl currently provides these server-side parameters:
Parameter
|
Description
|
cpk.plugin.id
|
the plugin ID
|
cpk.solution.system.dir
|
the pentaho solution system dir (full path)
|
cpk.plugin.dir
|
the plugin dir (full path)
|
cpk.plugin.system.dir
|
the plugin system dir (full path, this isn't used very often though and it might become deprecated)
|
cpk.webapp.dir
|
webapp dir (full path)
|
cpk.session.username
|
session username
|
cpk.session.roles
|
session roles (string with session authorities separated by commas)
|
Marco Vala explains:
Additionally, if you add a parameter named
cpk.session.SOMETHING
CPK will try to find a session variable named SOMETHING and "injects" its current value
(this is one way only, just for reading session variables)
There is also a handy parameter named
cpk.executeAtStart
If its default value is set to "true", CPK will execute that Kettle when plugin starts
Amending our transformation
We have to implement following changes:
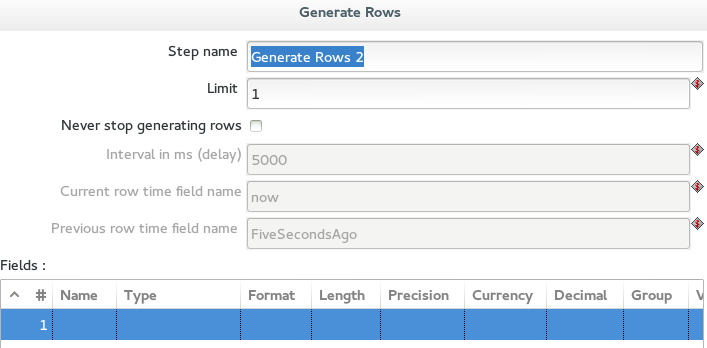
- Remove any fields from the new Generate rows step. It should be blank:
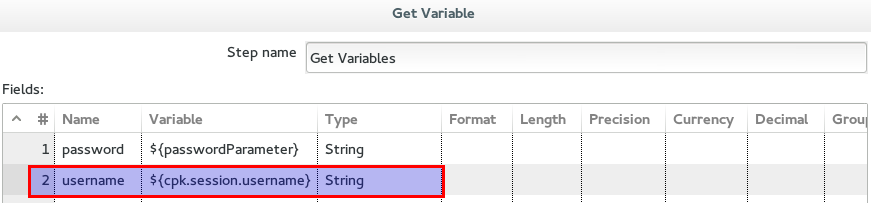
- Open up the Get Variables set and configure it as shown in the screenshot … add the username variable referencing cpk.session.username:
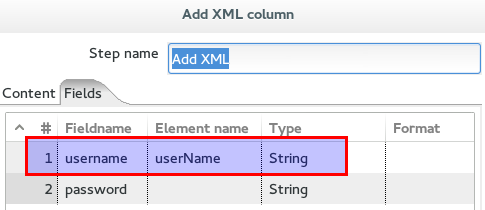
- Adjust the Add XML step:
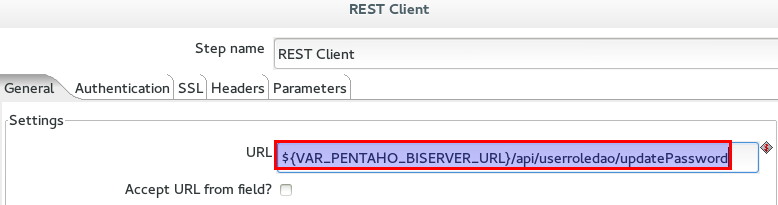
- Change the config of the REST Client step to not read any more the URL from the field but instead key it into the URL config field like this:
${VAR_PENTAHO_BISERVER_URL}/api/userroledao/updatePassword - Also, in the Authentication reference the parameters we just set up: ${VAR_PENTAHO_BISERVER_USER} and ${VAR_PENTAHO_BISERVER_PW} respectively.
- Save and then restart the server.
- Then test again the dashboard and watch the Tomcat log.

Oh well, oh well, all is not perfect right now … you wonder why we actually have to authenticate - this file is already on the server - right? Rest assured, Pedro’s team is already working on this feature!
So with the solution created so far every user should be able to change their password. The core functionality is provided, we will not cover the rest in this tutorial.


