Sunday, June 13, 2010

PDI: Clone your data in Kettle! (Video Tutorial)

In this tutorial we look at the cloning feature of Pentaho Data Integration/Kettle and use the power of the JavaScript step. Please watch the video here:


Part 1:


Part 2:

Part 3:

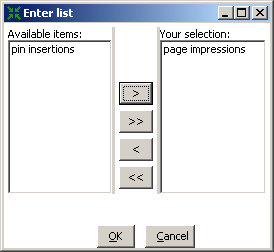
The files for this tutorial: Download the budget data here and the PDI/Kettle file here.


You can find the video's also on YouTube:


Video Part 1: click here
Video Part 2: click here
Video Part 3: click here


Please find below some more information:

Code for 1st JavaScript step:

function daysInMonth(iMonth, iYear)
{
iMonth=iMonth-1;
return 32 - new Date(iYear, iMonth, 32).getDate();
}

var days_in_month=daysInMonth(month,year);
var days_loop_nr=days_in_month-1;

var year=2010;

var bdgt_unsubs=bdgt_sub_base_start+bdgt_new_subs-bdgt_sub_base_end;


I found a nifty function (”daysInMonth”) on the internet that calculates the days of a particular month (we are neither JavaScript heros nor do we have time). This function provides us with the required number of days in a month, which we assign to the days_in_month variable. Important thing to remember is that we already have one row of data for each month, hence we have to deduct 1 from the days_in_month. We store this value in the “days_loop_nr” variable which we will use for the clone step.

We also add a default year and calculate how many users unsubscribed from our service (”bdgt_unsubs”). We need this figure as we want to calculate later on a daily figure for the subscription base (users subscribe and unsubscribe all the time).


Code for the 2nd JavaScript step:

var day_of_month;
// used to hold value of previous row:
var year_month_old;
var bdgt_sub_base_start_old;
var bdgt_new_subs_daily_old;
var bdgt_unsubs_daily_old;


//define day of month
var year_month=(year+"")+(month+"");

if(year_month!=year_month_old){
day_of_month=1;
}
else {
day_of_month=day_of_month+1;
}


//calculate the daily sub base at the start of the day
if(month==1 && day_of_month==1){
var bdgt_sub_base_start_daily=bdgt_sub_base_start;
}
else {
var bdgt_sub_base_start_daily=bdgt_sub_base_start_daily_old+bdgt_new_subs_daily_old-bdgt_unsubs_daily_old;
}


//keep value of current fields for next iteration
//assign them to a new variable so that they are available in the next iteration
//it is important that you only save the new value of year_month
//here as you want to work with the old value in the if statement
//above
year_month_old=year_month;
bdgt_sub_base_start_daily_old=bdgt_sub_base_start_daily;
bdgt_new_subs_daily_old=bdgt_new_subs_daily;
bdgt_unsubs_daily_old=bdgt_unsubs_daily;


We declare some variables first. Then we create the day number for each row: We use an if condition therefore. We have to start with 1 when a new month begins and then increase the number by 1.

It is important to understand the condition:
if(year_month!=year_month_old)

For the very first row of our dataset, the variable year_month_old won’t have a value. Hence, if(year_month!=year_month_old) will be true.

At the very end of the script we create a new variable call year_month_old which stores the current value of year_month for the next iteration. We only create this variable at the end of the script, so that we can use it in the next iteration for the condition before we overwrite it again.

A variable will be only overwritten if a new value is available.

So imagine we are in the second row of our dataset, the if(year_month!=year_month_old) condition will look like this: if(201001!=201001), hence the script will increase the value of the day by 1.  Once the month changes (i.e. if(201002!=201001)) then we have to start with 1 again.

That’s quite a nice solution. Again the javascript code might not be the best one, but it works. Please feel free to improve it.

We also have figures that we cannot just divide by the number of days in a month. The subscription base has to be calculated in a more complex way (well, not that complex). The calculation uses the same concept as above: saving the field value of the previous row in a new variable so that you can use it again in the current row.


Friday, June 4, 2010

PDI: Full Outer Joins

Pentaho Data Integration: Full Outer Joins

Creating full outer joins in Pentaho Data Integartion (PDI aka Kettle) is a fairly straight forward approach ... let’s have a look at it:

In this example we will be looking at data of an online acquisition process. We are facing the problem that the tracking hasn’t been implemented correctly, hence it can happen, that in a few cases we have pin insertions but no page impressions.

This is a good example to use a full outer join, as we will preserve all the data and can demonstrate to management that there is indeed a problem with the tracking setup.

Imagine we have two simple data sets:

Page Impressions

date
service
mk
page impressions
2010-05-01
serv1
123
231
2010-05-01
serv2
443
2
2010-05-01
serv3
234
33

PIN Insertions

date
service
mk
pin insertions
2010-05-01
serv5
33
231
2010-05-01
serv2
443
1
2010-05-01
serv1
123
55

Ok, let’s get started: Copy the above data sets into two separate Excel spreadsheets, save the file and fire up PDI/Kettle.

Create a new transformation. First thing to do in Kettle is to drag and drop an Excel Input step (you can find in in the Input folder in the Design tab on the left hand side). Double click on it. Click on “Browse” and choose the file that we just saved. Click “Open”. The file dialog closes, then click on “Add” (next to “Browse”).

Next click on the “!Sheets” tab followed by clicking on “Get Sheetnames”. Mark the sheet name that contains the page impressions, then click “>” to add it to your selections. It should look like this now:


Click “ok”.

Go to the “!Fields” tab and click on “Get fields from header row(s) ...”:

Now we are ready to view the data: Click on “Preview Rows” and check if everything is alright.

Close the preview window and click “ok” to close the step window.

Now mark the “Excel Input” step and copy and paste it. Open the new step and change it so that it imports the other spreadsheet. Make sure that you change the sheet name and the field names! Preview the data to see if everything is ok.

We now add a sort step for each of the Excel Input steps. Connect the Excel Input steps and the Sort Steps with a hop by holding down SHIFT and drawing a line from one step to the other.


Open the Sort Step and click on “Get fields ...”. Mark the row that contains “page impressions” or “pin insertions” and press DELETE (we obviously don’t want to sort by the measure). Click “Ok”. Do exactly the same for the other Sort Step.

As we have now sorted our data sets, we can join them. Drag and drop a Merge Join Step onto the canvas and connect both Sort Steps to it.

Open the Merge Join Steps, set the first step to “Sort Rows” and the second step to “Sort Rows 2” and join type to “Full Outer”. As we use a full outer join, it isn’t really important which step you mention in first step or second step.

Now click on “get key fields” and delete the measures. It should look like this now:

Now it is a good idea to preview the data again. Mark the Merge Join step and press F10. In the “Transformation Debug Dialog” click on “Quick Launch”.

You see that Kettle has successfully joined the data sets. As we chose “Full Outer” as join type, we can see all the data from each input data set. You will also realize, that both data sets had field names in common, so Kettle added “_1” to the field names of the second data set to avoid any confusion.

So now let’s clean up this result set a bit, to make it look nicer. We will add new fields called date_king, service_king and mk_king, and will use the values date or date_1 ( and so on) to populate it. The goal is to have for each row a proper date, service and mk value.
Add a Formula step and connect the Merge Join step to it. Fill out the Formula step as shown in the screenshot below:


Here the formulas to copy:
IF(ISBLANK([date]);[date_1];[date])
IF(ISBLANK([service]);[service_1];[service])
IF(ISBLANK([mk]);[mk_1];[mk])

What we do here is to check if one of the fields is empty and if yes, we use the value of the other one.


Click “Ok” to close the step configuration.
Now do a quick preview by clicking on the step and pressing F10.

As we don’t want to have all the unnecessary data in our final result set, add a “Select values ...” step, create the hob and open the configuration window of this step. Click on “Get fields to select” and delete all fields except the ones shown in the screenshot below:


We also rename some of the fields and put them in a different order. Ordering works like this: Mark the row, press ALT and use the arrows to move the row to another position.

Press F10 again and now the result set should look like this:


Now everything looks pretty and nice. If you want to export the result set somewhere, feel free now to add one of the many export steps.

This is how to create an Outer Join in Kettle in a nutshell. I think you will agree with me in saying that this is fairly easy to achieve.